If you already have a video transcript, you are much closer to a publishable blog post than you might think. Instead of manually reshaping spoken words into headings, paragraphs, metadata, and a search-friendly structure, I use Video To Blog to turn that transcript into a solid first draft in minutes.
This workflow is especially useful for creators who want to turn existing video content into written content without starting from a blank page. You keep the ideas you already created, then turn them into an article that is easier to discover, scan, share, and publish.
For more ways to extend the life of your content, explore our content repurposing resources.
Start With a Transcript You Already Have
Head to Video To Blog and create an account if you have not already done so. There is a free option that lets you generate one blog post per month.
Once you are in the dashboard, select Create Blog Post, then choose the option to upload a transcript. Upload the transcript file you want to convert. In this example, I used a text file, but the workflow is designed to work with transcript files in different formats.
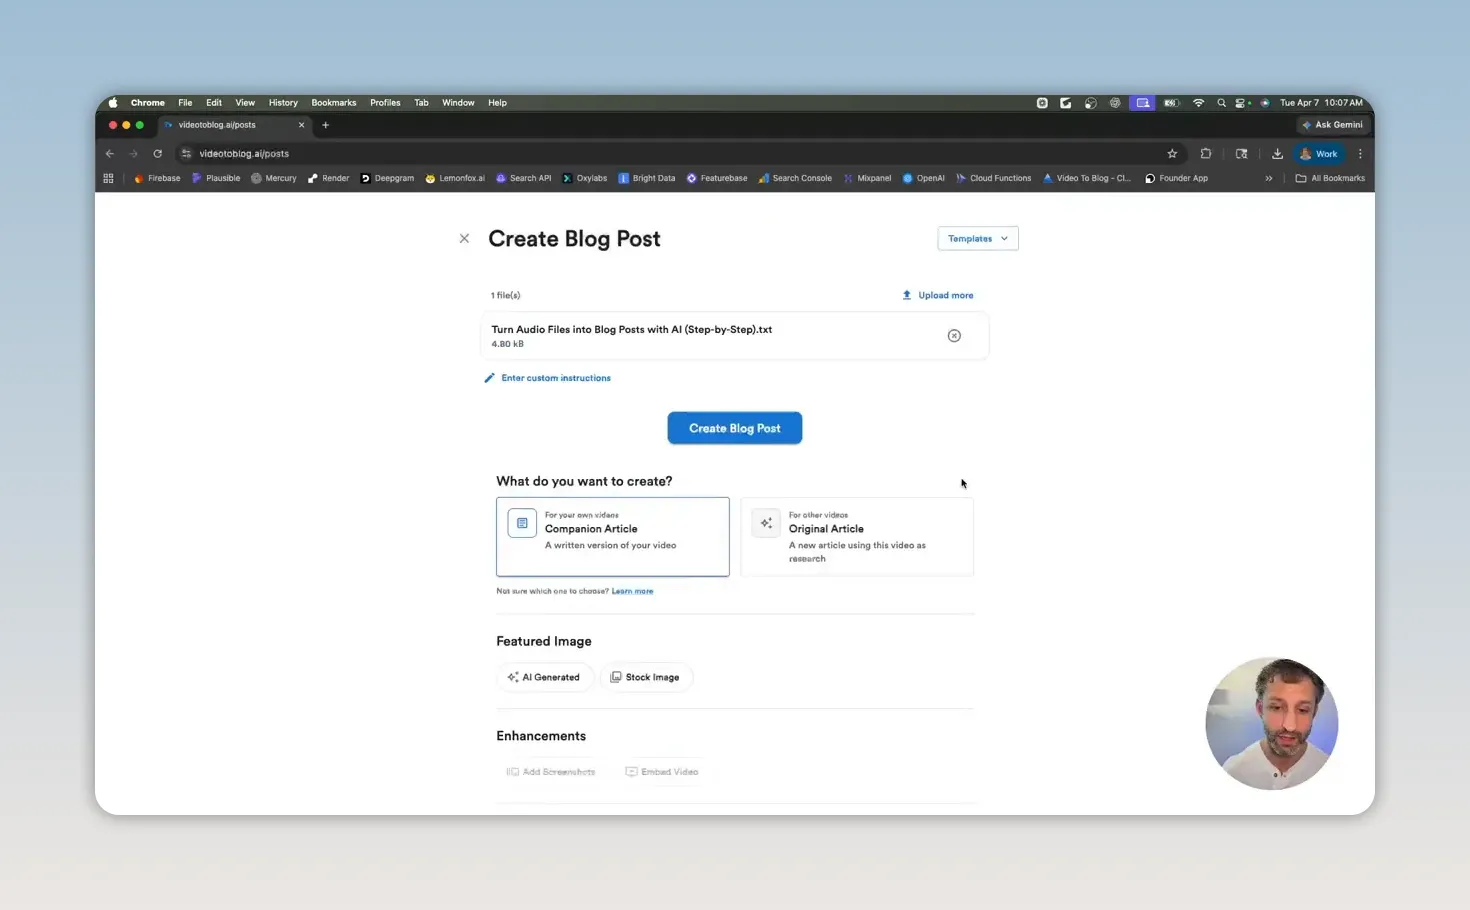
The important part is that your transcript contains the substance of the content you want to publish. A well-structured spoken explanation, tutorial, interview, or educational video gives the AI more useful material to work with.
Choose the Right Blog Post Configuration
After uploading the transcript, choose how you want the article generated. Since I am repurposing my own content into a written version, I select Companion Article.
This setting makes sense when the goal is to create a readable article that follows and expands on the ideas in the original content. It is a practical way to turn one piece of content into another format without losing the central message.
I also select an AI-generated feature image. This gives the post a visual asset from the start, so the draft arrives with more than just plain text.
Once those options are set, click Create Blog Post. The platform uploads the transcript and begins generating the article.
Generate the First Draft in Minutes
The generation process is quick. It can take roughly one to two minutes, and in this case the complete draft was ready in about 30 to 45 seconds.
That speed is valuable, but the real advantage is not simply getting words on a page. The generated draft organizes the source material into a blog format, including a title, section headings, paragraphs, and an AI-generated image.
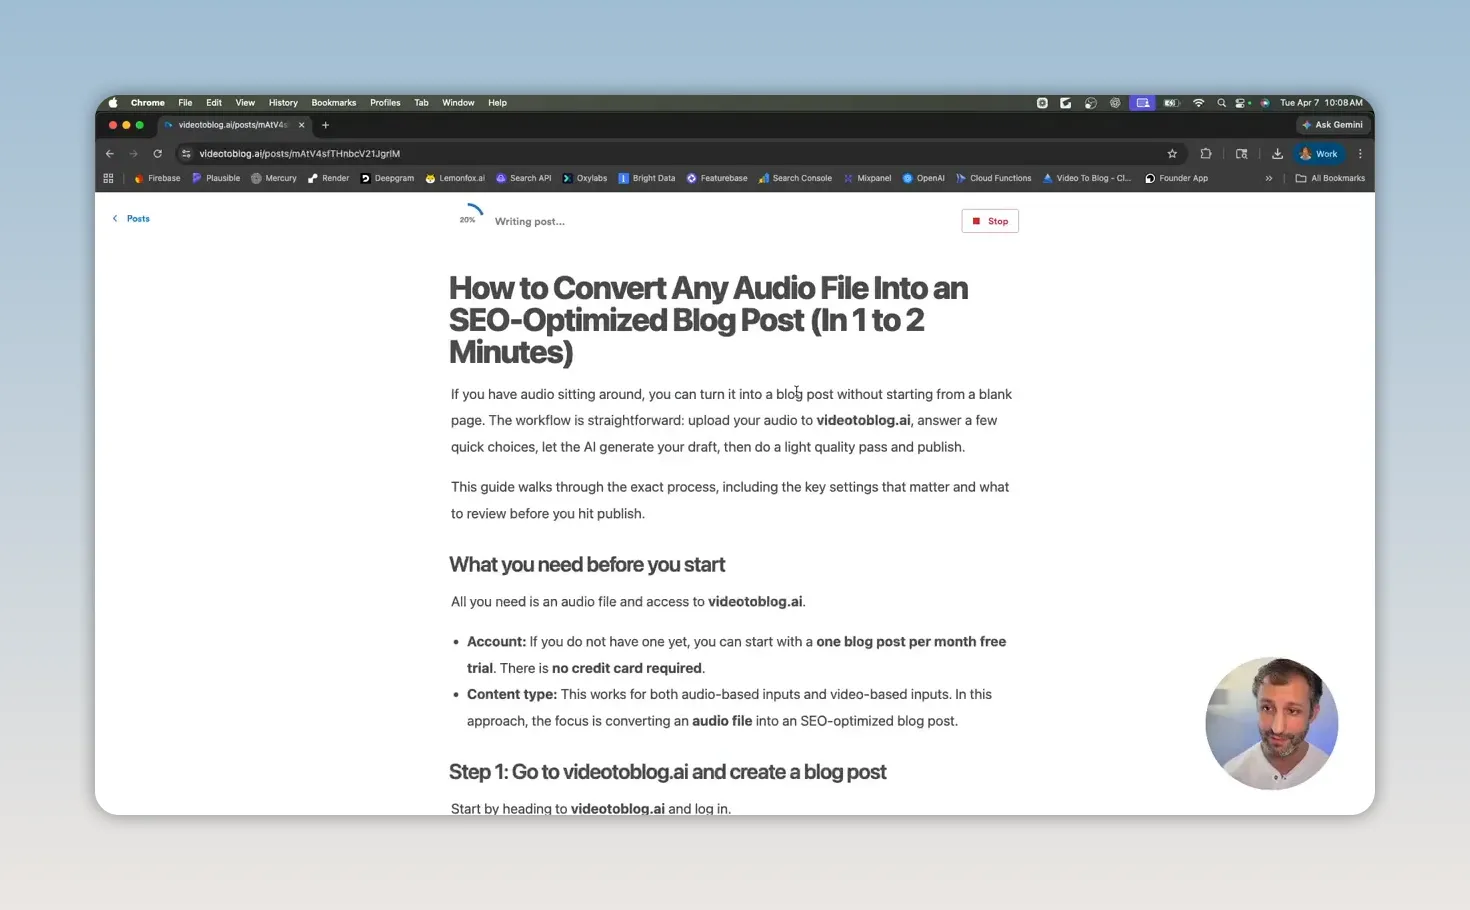
Rather than treating the output as something to publish blindly, I treat it as a strong starting point. The draft saves the time normally spent turning conversational language into a structured article, while still leaving room for my own editorial judgment.
Review the Article Before Publishing
Once the post is generated, scroll through it and read it closely. This is where I make sure the article accurately reflects the original ideas and reads naturally as written content.
Before exporting, I recommend checking:
- Accuracy: Make sure the details and explanations match the original material.
- Clarity: Tighten any wording that makes sense aloud but feels awkward on the page.
- Structure: Confirm the headings and sections follow a logical progression.
- Brand voice: Edit phrasing so it sounds like you and fits your site.
- Calls to action: Add relevant next steps, resources, products, or internal links where appropriate.
AI can handle the heavy lifting of drafting, but a quick human review is what makes the final article feel intentional and trustworthy.
Check the SEO Metadata and Blog Score
Video To Blog also generates metadata for the article. Open the blog sidebar to review the SEO-related information and check the blog post score.
This gives you a useful quality check before the article leaves the editor. You can see whether the post is in good shape from an SEO perspective, then make any edits needed before publishing.
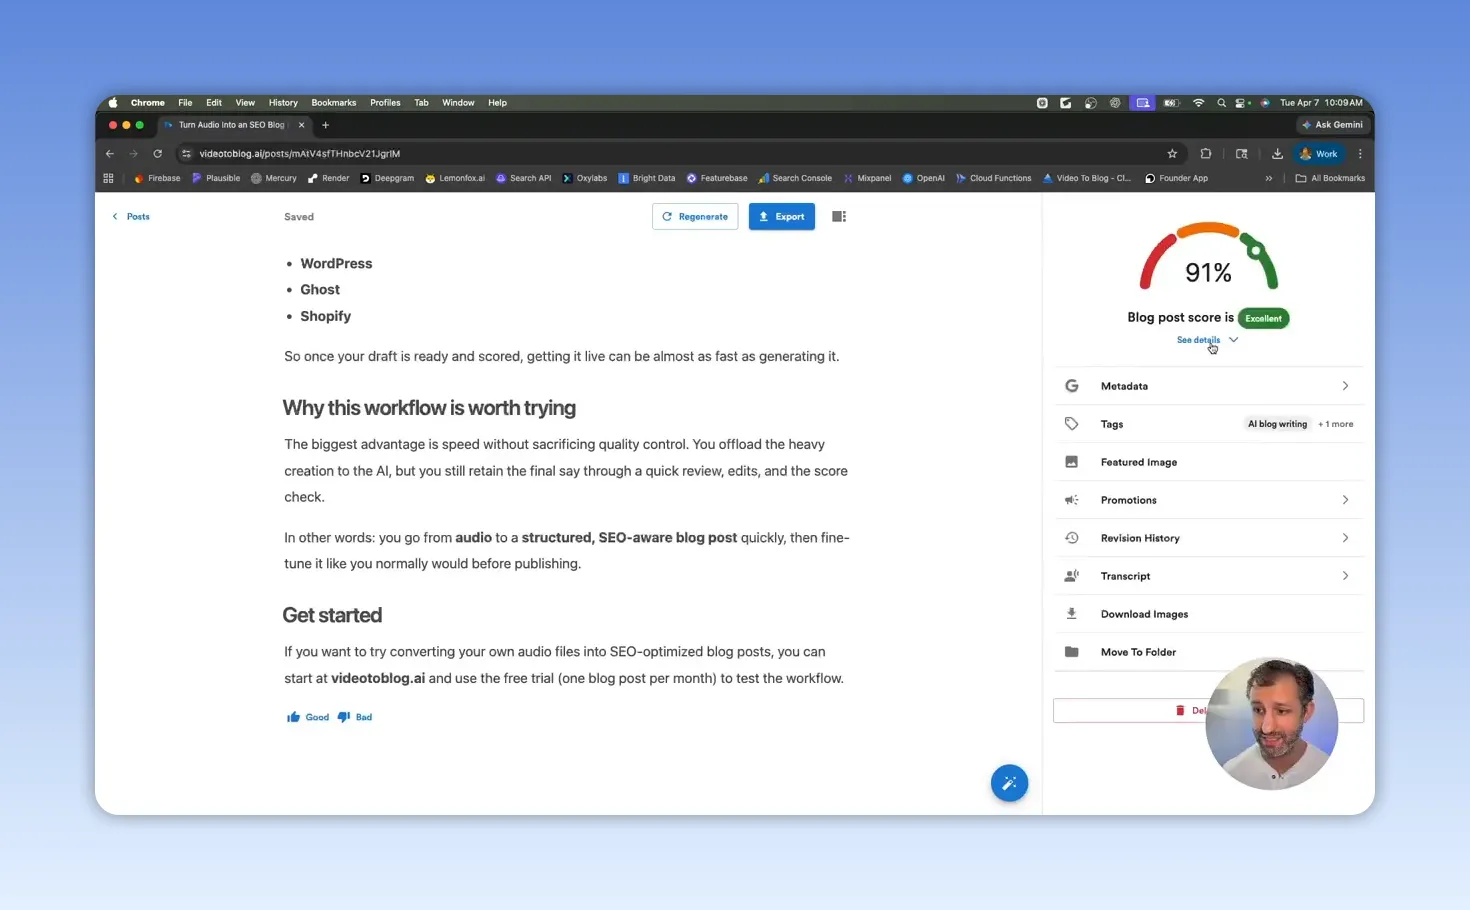
An SEO score is a helpful guide, not a substitute for useful content. The priority should still be a clear article that answers the reader's question and delivers the value promised by the title.
For a broader foundation on search-friendly content, Google's SEO Starter Guide is a useful reference alongside your own editorial review.
Export the Blog Post Where You Need It
Once I have reviewed and edited the draft, the last step is exporting it to my website or content workflow.
Video To Blog provides several export paths. You can export directly to a site, including platforms such as WordPress and Medium, or download the post in formats including:
- HTML
- Word document
- Other common file formats
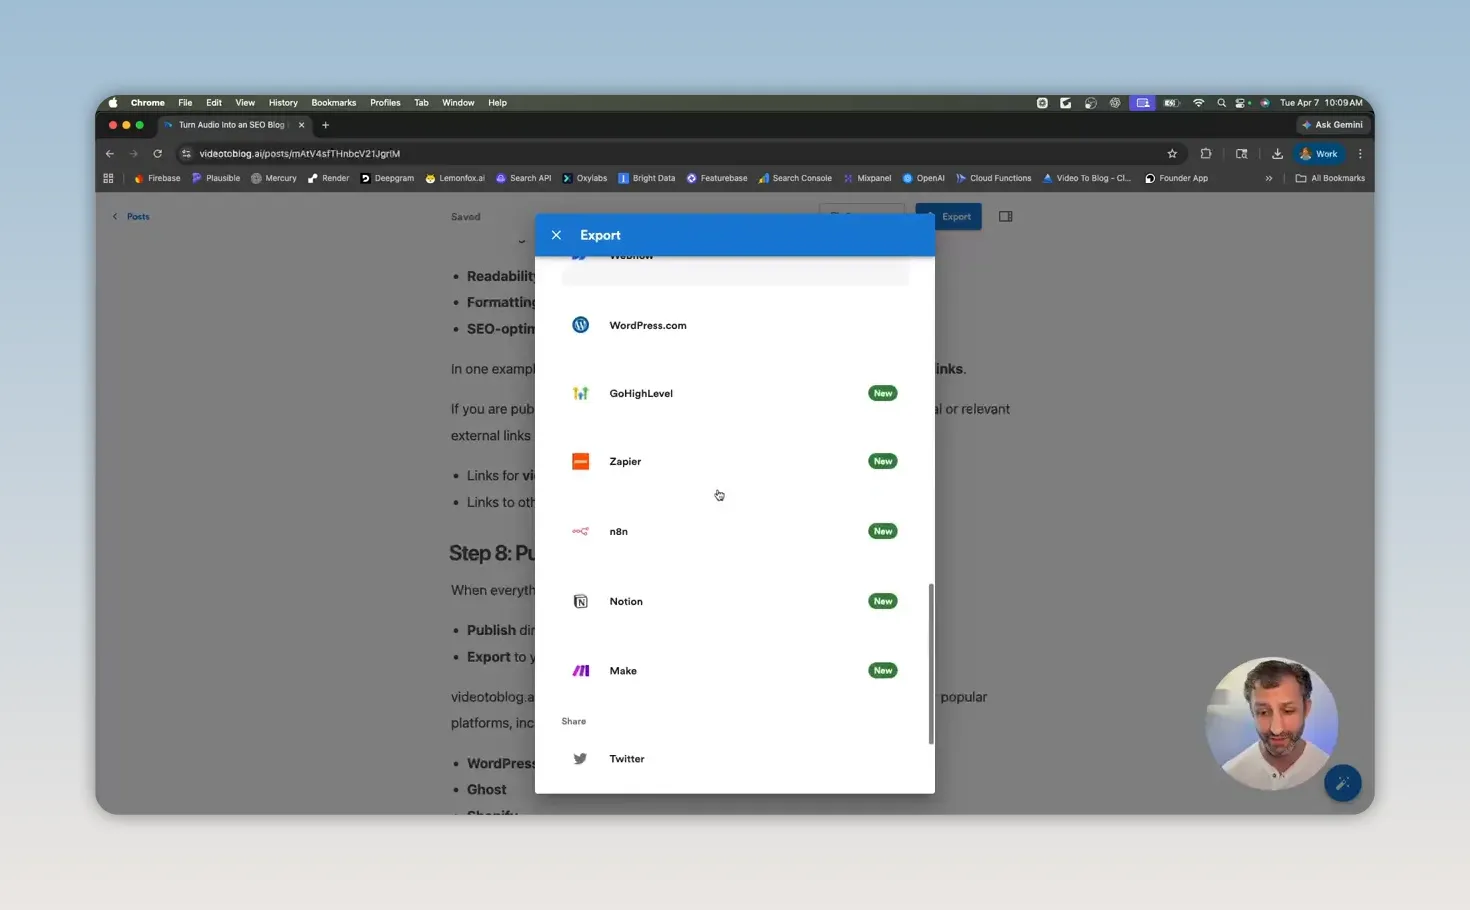
This flexibility matters because the best drafting workflow is only useful if the final post can easily reach the place where you publish.
Turn Existing Transcripts Into a Repeatable Content Workflow
A transcript does not need to remain a supporting file attached to a video. It can become the foundation for a complete SEO-optimized blog article, complete with structure, metadata, a feature image, and export options.
The workflow is simple:
- Upload your transcript to Video To Blog.
- Select the Companion Article format and any desired options, such as an AI-generated feature image.
- Generate the draft.
- Review the content, metadata, and SEO score.
- Edit for accuracy, clarity, and your voice.
- Export or publish the finished article.
Your next step is straightforward: choose one existing transcript, create a companion article, and give the resulting draft a careful edit before publishing. For a deeper walkthrough of the process, read the transcript-to-SEO-blog guide.


